Here is my Music Video:

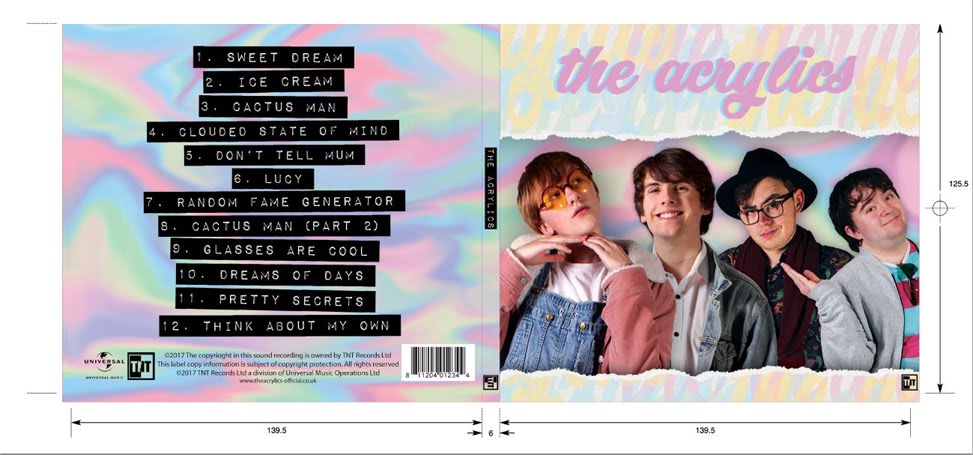
Here is the outside panel for my digipak:

Here is the outside panel for my digipak:

Here is the inside panel of my digipak:

Here is the inside panel of my digipak:

Here is my website:

Here is my website:
Please click the image to follow the link to our website.

Wednesday, 1 March 2017

Construction Post 27: My personal contribution to the Shoot Sessions

We did the shoot sessions at my house, as it seemed like the best location. I brought the camera to and from school, while Tom brought the rest of the kit on the first day and the last day of shooting. Both Tom and I filmed and set p lighting and camera (etc). I bought the bandages for Toby and supplied the cardboard boxes.

Me using the camera and setting up the shot (I am wearing the headpgones around my neck as I adjust the framing).
Me setting up our homemade diffusers for the lights in the main shoot.

I also made us some delicious pancakes for lunch.

Construction Post 26: Reflections on Edit Week 2

I think our edit week 2 went really well, even better than edit week 1. We successfully added the new footage from our back up shoot, and added the finishing touches to the sequence such as grading and sound mixing. Grading was my favourite part of the post production because I found three-way colour correcter really interesting and fun to use. We had to make a lot of our shots less yellow and I think we pulled it off quite well.

 This is our final product. A 2 minute opening sequence for our film, A Sight For Sore Eyes.

Construction Post 25: The Back-up Shoot

I think our back-up shoot went really well, as we retook all the shots we needed to and had a really fun time. We decided we needed a back up shoot because some of the footage from the main shoot had atrocious lighting in all of the takes, so we needed to fix that for our final edit. Also, we decided to change some parts of the sequence so that it made more sense, such as having a longer interview with Toby, as he is the main character.

We made a new shoot board for our back-up shoot with only the shots we needed to retake, and with what we needed to do in order to improve them written in some of the boxes.

Back-up shoot board page 1
Back-up shoot board page 2

Back-up shoot board page 3
WHAT WE DID DIFFERENTLY TO THE MAIN SHOOT
Shot 14/16 main shoot.
  1. When taking the interview shots, we asked various questions to the actors and had them stay in role when answering. This provided us with enough material to fill any gaps we might have when editing, and make Toby's interview longer, which was very important as he is the main character.
  2. Shot 14/16 back-up shoot.
  3. We closed the curtains in shot 14/16 in the living room so that there would be less contrast between the beginning and end of the shot. Also, it meant there would be less light coming in from behind Joyce, and lessening the silhouette effect we had in the main shoot.
  4. We took bonus shots, such as the shot of Joyce homeschooling Toby, and the shot of Joyce on Tinder. This meant that we had extra shots for any crosscutting we might need in editing.

Construction Post 24: Reflections on Edit Week 1

Our Edit week one was really enjoyable. We made really good progress on the project, and we were able to plan what shots we needed retake.

Me doing editing.

I think our edit so far is far better than our rough edit was with the improvements we have made, however there are still more improvements we can make in the back up shoot to make it even better (see construction post 25). Additionally, we still have to grade our shots and sort out some of the crosscutting, as well as editing the music appropriately.

Construction Post 23: Reflections on our Main Shoot Session

I think our main shoot quite well, as we took all of the shots we needed and had a fun time doing it. My favourite part of the filming was using the new lighting equipment that we hadn't used in the test shoot, as well as coming up with new ways to film some of the shots, such as the hidden camera shots we took of Toby and the camera person walking down the stairs.

OUR BEST SHOTS:

Shot 5.
This is shot 5. We changed it from the test shoot, as it was originally just a shot of Toby waking up, which did not make sense as part of a documentary style film. Instead, we changed it to a shot of watching Joyce go to Toby's bedroom to wake him up with breakfast in bed on his last day at home. I think this shot was really good because the handheld camera movements work well as part of the genre, and it worked much better in the narrative. Additionally, I think it was well constructed considering the small space we had to film it in.

A bonus shot.
This is one of the bonus shots we took. I really liked this shot because we recorded it with Toby singing and playing the guitar, so that we could use it with or without audio. I think this will be a really good shot to cross cut to in an interview, or to use as filler between shots.

Shot 17/19/21.
This is Joyce's interview shot (shot 17/19/21). I think Joyce's interview shots will always be my favourites because of how well my mum acted the part. She performed really well and managed to direct her lines perfectly when embodying the character. I also think that the choice of lines was good, and they are effective in representing her middle-class-edgy-white-mum character.

A bonus shot.
This is another one of the bonus shots that we took on the day of filming. I think this shot is really effective in conveying our genre to the audience, because it shows one of those typical daily life situations that are sop mundane, but are always in documentaries. We have put a twist on this however, by adding the fact that Toby is invisible, which, I think, really conveys the documentary genre.

Construction Post 22: Our Post-production Kit

We only used one piece of software for our post-production, being Adobe Premiere Pro. We also used a double screen computer to edit on.


EDITING EQUIPMENTPROS AND CONS
Adobe Premier ProI found this editing software really useful and easy to use. The different video and audio tracks allowed us to use multi-track editing, which helped us to see all the elements of our project at once. We were also able to see all of our rushes in the same place, so it was easier to choose the best takes of each shot.
Double screen computersThis was a really useful aspect of the hardware we were given. It meant that we could have our Adobe Premier Pro time line and rushes on the left screen, where we would do the editing, and the full screen edited video on the right screen, so that we could watch it in high definition as we went along. This made it much easier to stay organised and for us to know what we were doing as we were editing.


Adobe Premiere Pro.
Double screen computer.

Construction Post 21: Our Production Kit

We had lots of different pieces of equipment for the production of our film opening sequence.

FILMING EQUIPMENTPROS AND CONS
Canon Legria HFG30The camera shot in high definition, and was very easy to use and control. It focused and zoomed well, which is perfect for our chosen genre (even though we don't use those techniques much in our sequence).
Canon DM-100 Directional Microphone The microphone worked well in picking up voice, and was good at eliminating most background noise. However, it would have been more useful for it to be separate from the camera so that we could leave it in one place where the noise is happening, as it would help us focus the sound of each of our shots better.
Libec TH-650 HD Tripod The tripod was useful, although we didn't use it much, as the majority of our shots were handheld. However, it really helped us in the interview setup, because it allowed us to get it level (using the spirit level for guidance), and to have consistency throughout the shots.

Canon Legria HFG30.

Canon DM-100 Directional Microphone.

Libec TH-650 HD Tripod.